- September 23, 2024
Sometimes, removing polyurethane is so hard. Learn about the top 3 methods how to remove polyurethane from wood like a pro.
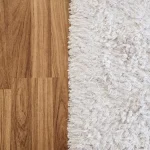
Polyurethane is widely used on flooring for its durability and resistance to wear. However, these same properties make it difficult to remove during refinishing or repairs. Removing polyurethane from flooring requires careful consideration. It’s important to choose methods that avoid damaging the surface. Whether you choose chemical strippers, sanding, or both, select the right approach. It is crucial for effective polyurethane removal. It ensures the floor is properly prepared for a new finish.
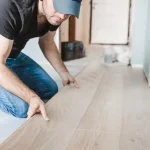
This step-by-step guide will help you navigate the challenges of removing polyurethane. It will also help you choose the best method for your specific flooring type.
Material required
- Chemical paint stripper
- Paintbrush
- Scraper (paint /metal)
- Steel wool or abrasive pad
- Sandpaper (any size grits)
- Clean rags
- Mineral spirits or denatured alcohol,
- PPE (gloves, safety glasses, and a mask),
- Drop cloth or plastic sheeting
What is Polyurethane?
Polyurethane is a versatile and widely used polymer in woodworking and flooring. It is known for its strong protective qualities. Polyurethane is composed of organic units linked by urethane bonds. It forms a tough, resilient layer. This layer shields surfaces from wear, moisture, and chemicals. It is for flooring and other wood-based projects.
There are two main types of polyurethane: oil-based and water-based.
- Oil-based polyurethane is favored for its durability. It also provides a rich, amber hue, which enhances the natural warmth of wood. It’s particularly well-suited for high-traffic areas where a long-lasting finish is essential. However, it emits fumes and takes longer to dry.
- Water-based polyurethane dries faster than oil-based options. It has a lower odor. It also preserves the wood’s natural color without yellowing over time. While it’s less durable, it’s an excellent choice for indoor projects. It is especially true when a clear finish and quicker application are desired.
Safety Precautions
When removing flooring polyurethane, safety precautions are crucial. They protect you from potential hazards. Always wear protective gear such as gloves, goggles, and masks. Gloves prevent skin contact with harsh chemicals. Goggles shield your eyes from splashes and fumes. Masks protect you from inhaling toxic vapors.
Also Read: Most Durable Flooring for High-Traffic Areas in Your Home
Proper ventilation is also essential when working with chemical strippers. These products can emit strong, harmful fumes. Ensure your workspace is well-ventilated. Open windows and use fans. It will enhance air circulation. After removal, dispose of chemicals and materials according to local regulations. Never dispose of them in regular trash or pour them down the drain. It can harm the environment.
Methods for Removing Polyurethane
Removing flooring polyurethane can be a challenging task. However, choosing the right method can make it more manageable. There are several effective techniques to consider. Each is suited to different types of polyurethane finishes and project requirements.
Method 1: Using Chemical Strippers
Chemical strippers are a common and effective method for removing flooring polyurethane.
- Begin by selecting an appropriate chemical stripper. Non-toxic options are preferable for a safer approach. However, traditional strippers are also effective.
- First, prepare your workspace. Ensure it is well-ventilated.
- Wear protective gear, including gloves, goggles, and a mask.
- Apply the chemical stripper evenly over the surface. Use a brush or roller for application. Follow the manufacturer’s instructions for the correct application amount and technique.
- Allow the stripper to sit for the recommended time. It is typically between 15 and 30 minutes. This waiting period helps break down the polyurethane. During this period, the stripper will soften the coating, making it easy to remove.
- Once the waiting time has elapsed, use a scraper or putty knife. Gently peel away the softened polyurethane. Work in small sections to ensure thorough removal.
- After scraping, clean the area with water or a neutralizing solution. Follow the stripper’s instructions to remove any leftover residue.
- Proper disposal of used chemicals and materials is also crucial.
Method 2: Using Denatured Alcohol and Lacquer Thinner (200 words)
Using denatured alcohol and lacquer thinner is an alternative method for removing flooring polyurethane.
- Begin by preparing a mixture of denatured alcohol and lacquer thinner. In a well-ventilated area, combine these two solvents in a ratio of 1:1 to create a potent solution.
- Use a clean, lint-free cloth or sponge. Apply the mixture evenly over the polyurethane-coated surface.
- Ensure the area is well-ventilated. Wear protective gear, including gloves, goggles, and a mask.
- Allow the solution to sit for several minutes to soften the polyurethane.
- After the waiting period, use a scrub brush or abrasive pad. Gently scrub away the softened polyurethane. Work in small sections to ensure thorough removal.
- Once you’ve removed the polyurethane, clean the area with water or a suitable cleaning agent. It will remove any remaining residue from the solvents.
- Dispose of used materials and solvents properly according to local regulations.
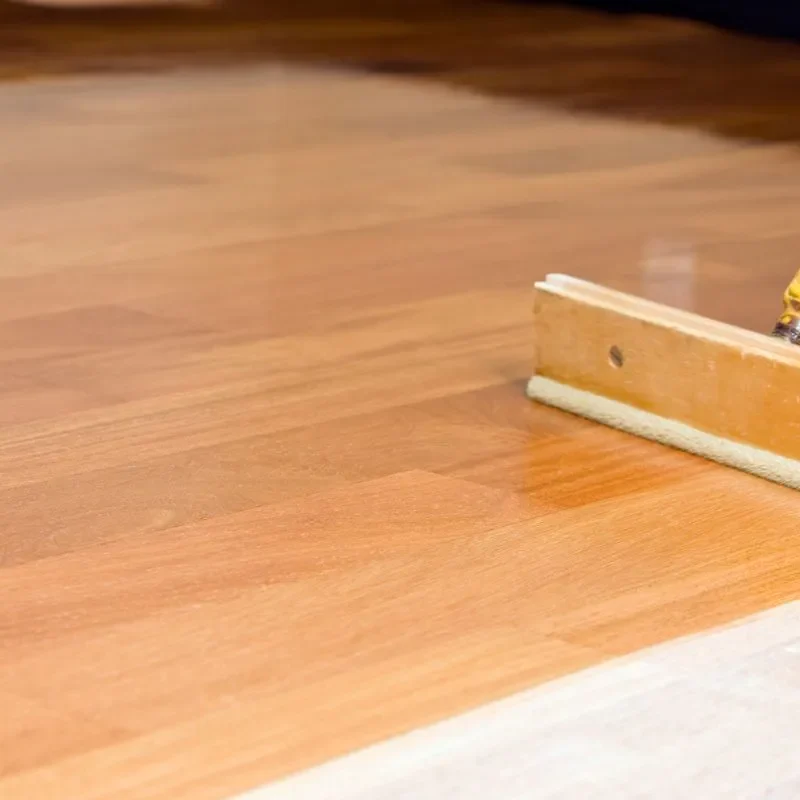
Method 3: Mechanical Removal – Sanding
Mechanical removal through sanding is a highly effective method. It is particularly useful for removing flooring polyurethane from large or stubborn areas. Sanding is best suited for situations where the polyurethane is thick or unevenly applied. In these cases, other chemical methods may be less effective or too harsh.
To begin, choose the appropriate sandpaper and tools. Coarse-grit sandpaper (around 60-80 grit) is ideal for the initial sanding phase. It effectively removes the bulk of the polyurethane. Use a floor sander or a hand-held orbital sander for larger surfaces to ensure even coverage. A sanding block or detail sander may be necessary for edges and corners.
Start sanding with coarse-grit sandpaper. It will strip away the top layers of polyurethane. Work methodically in the direction of the wood grain to avoid scratches. Once the majority of the finish is removed, switch to medium-grit sandpaper. Use around 120 grit to smooth out the surface and remove any remaining residue.
Finally, use a fine-grit sandpaper (around 180-220 grit) for a smooth, even finish. Ensure the workspace is well-ventilated. Wear protective gear – a dust mask and goggles, to protect yourself from dust and debris. After sanding, clean the area thoroughly to remove any dust.
Removing Polyurethane from Specific Surfaces
Removing floor polyurethane from specific surfaces requires tailored approaches. It ensures you handle various materials effectively and safely. For hardwood floors, choose a method that preserves the wood’s integrity. Chemical strippers are commonly used. However, sanding can also be effective. It is particularly for stubborn finishes.
When using chemical strippers on hardwood, apply the stripper evenly. Allow it to soften the polyurethane. Then, scrape off the residue carefully. Follow up with sanding if needed. Use progressively finer grits to smooth the surface.
For engineered wood, sanding is generally less recommended. This is because engineered wood often has a thinner veneer. Sanding can damage the surface. Instead, opt for chemical strippers or denatured alcohol combined with lacquer thinner. Always test a small area first to ensure the method does not damage the veneer.
Laminate floors require extra caution. They are sensitive to moisture and harsh chemicals. Use a chemical stripper specifically designed for laminate or apply denatured alcohol carefully. Avoid excessive moisture. Do not use abrasive scrapers that could damage the laminate surface.
For tile surfaces, polyurethane removal can be done with chemical strippers. Ensure the strippers are safe for tile. Apply the stripper, allow it to work, and scrub the surface with a non-abrasive pad. Rinse the area thoroughly to remove any residual chemicals.
Eco-Friendly Alternatives
Eco-friendly alternatives for removing floor polyurethane include soy-based paint removers. They are preferable compared to traditional chemical strippers. Soy-based removers are derived from natural sources. They are less toxic for both users and the environment. They effectively break down polyurethane without the harsh fumes associated with conventional strippers.
Don’t know what to choose? Laminate or Vinyl? Read our full comparison!
However, eco-friendly removers may require more time to work. They may not be as powerful as chemical strippers. It can make them less effective on heavy or stubborn finishes.
To use soy-based paint removers, follow these steps:
- First, ensure your workspace is well-ventilated.
- You must have appropriate protective gear, such as gloves and goggles.
- Apply the soy-based remover evenly over the surface. Use a brush or roller for application.
- Allow the product to sit for the recommended time. It is usually 30 minutes to an hour. This waiting period helps penetrate and soften the polyurethane.
- After the waiting period, use a scraper or putty knife. Gently remove the softened polyurethane.
- Clean the area with water to remove any remaining residue from the remover.
Post-Removal Care
After removing floor polyurethane, proper post-removal care is crucial. It ensures a successful refinishing process. Begin by thoroughly cleaning the surface. Remove any residual chemicals, dust, or debris. This step is essential for achieving a smooth and even finish. Use a vacuum or a broom to remove loose particles, followed by a damp cloth or mop to clean the surface.
If you use chemical strippers you must neutralize any remaining chemicals. Follow the manufacturer’s instructions for neutralization. This step prevents potential reactions that could affect the new finish.
Once the surface is clean and neutralized, inspect it for damage or imperfections. Sand the area lightly to smooth out any rough spots and ensure good adhesion of the new finish. Follow the product’s instructions when reapplying polyurethane or choosing an alternative finish. Apply the finish carefully according to these instructions.
Conclusion
Removing floor polyurethane can be a detailed process. Follow this step-by-step guide to ensure effective results. Start by selecting the appropriate method for your specific surface. It could be chemical strippers, denatured alcohol, lacquer thinner, or sanding.
Carefully apply the chosen product or technique. Allow adequate time for it to work. Thoroughly remove the softened polyurethane and clean the area to eliminate any residues. Always prioritize safety by wearing protective gear and ensuring proper ventilation.
Do you need more help? Contact us, and our professionals at Elephant Floors will answer every question you have.